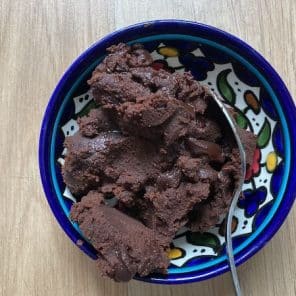
I became a bit obsessed trying to find the right chocolate spread to fill chocolate buns. Of course it had to taste good, but it also needed to work when baked. I discovered a wonderful spread created by Elizabeth Lau aptly named Lick the Knife Clean Chocolate Spread. She’s kindly given me permission to share this with you with my slight adaptations.
The spread is easy to make and keeps for ages and ages in the fridge. It can be used for all sorts of purposes. I particularly like it as it is nut free, not too sweet and is easy to use. They key is using good chocolate. You might not usually choose 70% chocolate, but it makes all the difference. I am currently using Callebaut Belgium Callets (like small buttons), but you can use a bar of chocolate equally well. Unlike some fillings it doesn’t disappear when you bake it.
To make this recipe vegan, check out dairy free chocolate and use vegan spread such as Flora Plant Butter.
What makes a good chocolate bun? The dough needs to be light and moist, the filling generous but not too generous that it leaks everywhere. I’ve now made hundreds of these and the feedback is always great.

Make the Chocolate Spread
You’ll need about 1/3 of the quantity for the chocolate bun recipe. The chocolate spread keeps extremely well in the fridge. No longer do you need to use Nutella. This is a far superior filling!

Chocolate Spread Recipe
Equipment
- Saucepan
- Wooden spoon or whisk
- Plastic box with lid
Ingredients
For the Chocolate Spread Filling
- 60 ml water
- 100 gr caster sugar
- 20 gr cocoa powder unsweetened
- 5 ml vanilla extract
- 110 gr 70% dark chocolate either buttons or a tablet broken into pieces
- 130 gr butter cubed salted or unsalted
- 1 pinch salt
Instructions
Make the chocolate spread
- In a saucepan, melt the water, sugar, cocoa and salt until the mixture lightly bubbles
- Remove from the heat and add the butter and chocolate. Stir until completely melted. Add the vanilla extract.
- Pour into a container with a lid. When cool put into fridge. It will keep for weeks. Before using in baking remove from the fridge 30 minutes before you need to use it.
Notes
Make the Chocolate Buns

These delicious buns are easy to make, you’ll just need a little time. Fill them with the chocolate spread – just remember to take the spread out of the fridge before spreading.

Luscious Chocolate Bun Recipe
Equipment
- Stand mixer
- Rolling pin
- Pastry Brush
- Plastic box with lid
- Palette knife
- Dough scraper
- Digital scales
- Small saucepan
Ingredients
For the Tangzhong
- 25 grams butter
- 25 grams flour
- 50 millilitres milk
For the dough
- 500 grams Type OO Flour or bread flour
- 7 grams dried instant yeast or 10 gr fresh yeast
- 2 eggs The second egg is for egg wash
- 250 millilitres water
- 25 grams butter
- 8 grams salt
- 50 grams sugar
Instructions
Tangzhong
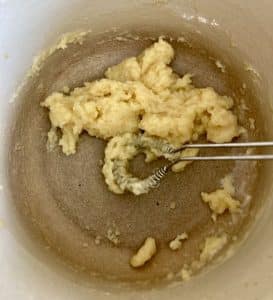
- Make the Tangzhong. Weigh out the ingredients in a small saucepan, melt the butter and add the flour and mix, then add the milk. Cook for a few minutes. This is similar to making a roux for a sauce. The mixture will be very thick. . Set aside and allow to cool down. As it cools it softens and becomes pliable

Make the dough
- Weigh out the ingredients. In the bowl of your stand mixer, add the flour, yeast, sugar, salt, egg and 250 ml water.
- Mix with the dough hook until all the flour incorporated. It will be very stiff. Add the Tangzhong in small lumps. Then add the butter in small pieces.
- Mix until the mixture reaches between 24 and 26°C. The time this will take will depend on how cold the ingredients were to start with. The dough will come away from the sides of the bowl and will feel very stretchy.
- Cover or place in a plastic box with a cover and allow to rise for 1.5 hours. Alternatively, put the dough in the fridge to prove for a minimum of 3 hours or overnight.
- When shaped you will need to leave the buns for about an hour so preheat your oven to 190°C (375°F) at least 1/2 hour before you need to bake.
Roll, fill and cut
- Remove the spread from the fridge 1/2 hour before you need to use it.
- Once your dough has proved either in the fridge or overnight, roll it out to a rectangle about 1/2 cm thick. If you are making the dough without it resting in the fridge, chilling it for 15 minutes will make it easier to work with
- Using a palette knife spread the chocolate spread over the dough right to the edges. Spread evenly but not too thickly. It is tempting to add too much, just remember you will be rolling it up.
- Roll up tightly from the longest side to form a long roll.
- Cut into 80 gr pieces. Try to make sure they are of even size to ensure they bake evenly. Tuck the end of each roll underneath to stop it unravelling when baking.
- You’ll now place the buns on your baking tray a thumb width apart. Brush with beaten egg.
- Allow to prove for at least an hour at room temperature. You’ll see that the buns will have grown and will be almost touching.
Bake
- Brush with beaten egg a second time. Bake for 15 minutes then check for colour, they should be a light golden brown. Bake longer if necessary.


My sincere apologies. I originally wrote this as one recipe, then split it and left some of the ingredient behind. It should have sugar and more salt. Now amended. Glad you liked the spread.
I would give the chocolate spread 5 stars and the bread dough 1 star. I did wonder about the small amount of salt and no sugar in the dough recipe, should have gone with my instinct and added 5g of salt and a maybe 15g of sugar. The dough is extremely bland although a good texture, but I was making them to share with family which I will not be doing. They will go in the freezer and we will eventually eat them ourselves. First time I have used a tangzhong, interesting.