Bust those myths about making bread
It’s time to question what cookery book writers are telling you. In July 2020, a group of experienced female bakers us held our first Bread Chat on Zoom. We had a lively discussion on yeast and tried to bust some of the myths. We all bake bread in our own way, and certainly don’t agree on everything, but when dubious instructions are spread time and again, we despair. These are bread myths that are passed on again and again without question.
Following a professional breadmaking course as I did in France means you become pragmatic. If you have a lot of bread to bake, you want to do so in the simplest way, using just the right amount of ingredients and of course, ensuring you are maximising your profit. The flavour goes without saying!
We have heard many times, when we have queried why certain instructions have been given, “Oh, it is to make it easier for the readers”. Rubbish! Recipes are checked for accuracy, we hope, but is the method ever questioned? We think not.
Here are some of the worst bread myths – unchecked facts. I am sure you’ll have many you’ll want to add. Let’s pose the question of the recipe writer of why they have asked us to do things in a certain way. You may think it unfair that I have focussed on the writers mentioned. Suffice to say, these are just a few examples.
Yeast
Just add your yeast into the dough, no preparation needed
Instant means instant! If you’re making bread with yeast, you’ll use either fresh or dried. Instant dried yeast is just that, it’s ready to use straight away. It does not need anything done to it first.
You do not need to add water and sugar to fresh yeast and “let it froth” for 15 minutes as requested in Diana Henry’s recipes in the Telegraph. You can simply rub the fresh yeast straight into the flour. And what does “let it froth mean”? Equally, instant/fast action dried yeast, is just that.
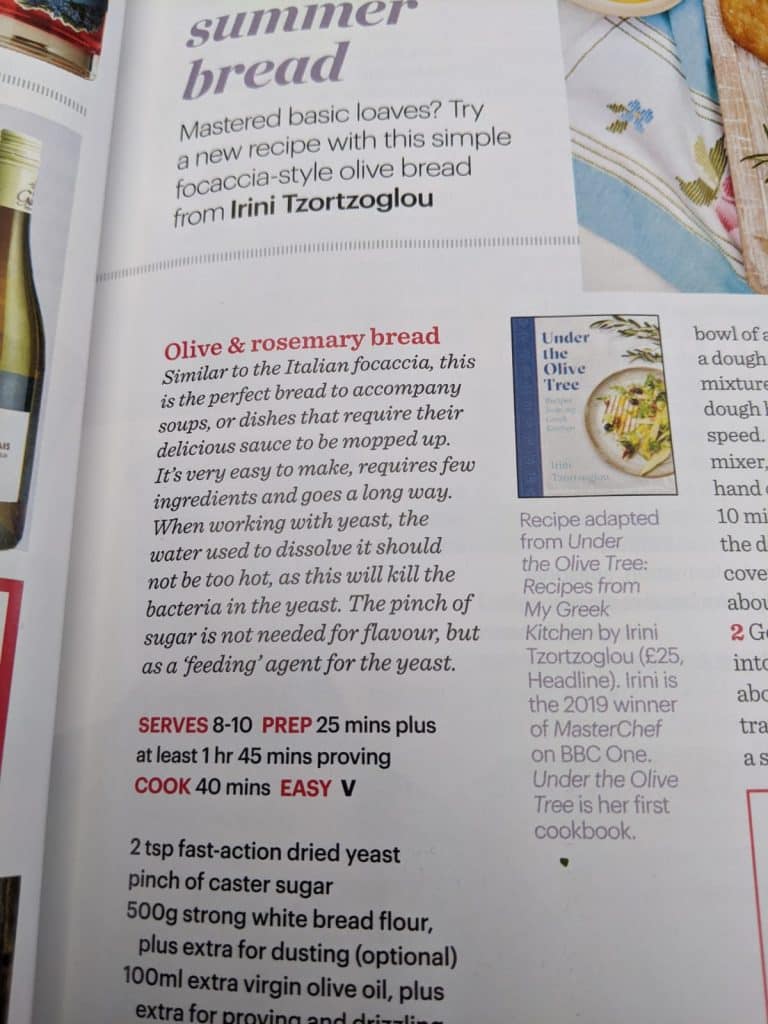
In a different recipe from Masterchef winner Irini Tzortzoglou, she states “When working with yeast the water used to dissolve it should not be too hot. The pinch of sugar is not for flavour but a ‘feeding agent’ for the yeast”. Fast action yeast does not need sugar nor should it be pre-prepared and what temperature is ‘not too hot’.

What you should do: Add the fresh or dried yeast directly to the flour. There is no need to feed it, froth it or anything else. If its fresh yeast, just crumble it in. If it is instant yeast just ad and mix a little.
Quantity of yeast
You only need a small amount of yeast to get your bread to rise
We have seen ridiculous amount of yeast in a bread recipe for 500 grams of flour – as much as 30 grams of yeast! All you need to use is between 5 and 10 grams of fresh yeast or around half that of dried yeast 2.5 to 5 grams (it’s quite ok to round it up to the 7gr standard sachet) for that quantity of flour.
If you were baking bread for your business, imagine how much more yeast you’d need to spend your hard earned cash on each year. The argument from cookery writers has been “home bakers want to see quick results”.
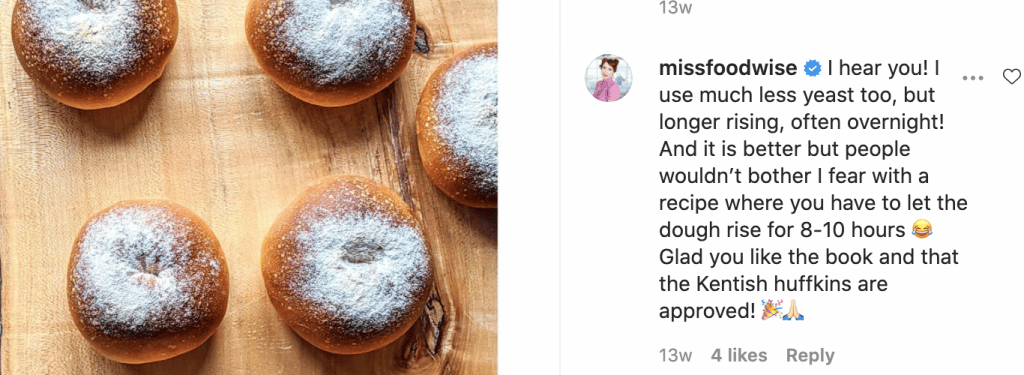
Steph Club commented on this post that she’d reduced the amount of yeast from 18g to 5g in a recipe. This is the author’s response
What you should do: Add between 1 and 1.5% of fresh yeast or 0.5% and 0.75% of dried yeast to your recipe. Eg for 1 kilo of flour it would be between 10 and 15 grams of fresh yeast, 5 and 7.5% (round up to 8 g) dried instant yeast. NB If it is dough that includes butter and/or eggs you will add a higher percentage of flour.
Heat
Keeping your bread warm isn’t necessary
I have some bread proving in the fridge at the moment. I did not need to ‘put it in a warm place to prove’ as instructions might say or put it in the airing cupboard. Nor do I need to turn my oven into a prover by turning the heat on for a short time, then turning it off.
The key is to get your dough to the right temperature when you knead it. It should be between 24 and 26°C (78° F)when you have finished kneading. How do you achieve this? By starting with water at the right temperature. I’ve a separate article on water temperature, but essentially, add the temperature of the room (in centigrade) to the temperature of the flour and take away from 60 (the base temperature). So, if you are somewhere hot, your water is going to need to be very cold. If you are somewhere very cold, it will need to be pretty warm.
In the recipe below, for Ooni pizza, 100°C water is added to 20°C tap water. I’d suggest that is a very easy way to kill the yeast!

As I kneaded my dough to 25°C, I was able to put it in the fridge. I can even leave it overnight and it will still make great bread.
What you should do: Check the formula above and use water at the correct temperature in your dough. This works for both yeasted and breads with sourdough.

Proving
How do you know when your dough has proved sufficiently? Proving is when you rest the dough before shaping. Many instructions say wait until it has “doubled in size”. Can you imagine the average baker looking at 10s of loaves and gauging if they have doubled? And some dough such as wholemeal, does not inflate as much as others. Bakers will know how long they need to leave the dough after mixing to between 24 and 26°C, typically an hour to an hour and a half (for yeasted dough). They’ll factor that into their baking schedule. Or of course, they might leave the dough overnight in a cool place.
What you should do: Each time you make a loaf, make notes on how long you left it and what the result was. When the weather is hot, the bread has proved more quickly than usual. Use the right size tin or banetton. Check the capacity of your tin or banetton first.

Knocking Back
Picture this, you’ve kneaded the dough, you’ve let it prove for the right amount of time, it has risen nicely.
If you follow the cookery writer’s instructions, you will get rid of all that lovely air right by ‘knocking back’. This supposedly redistributes all the bubbles in the dough for a smoother result.
There is no need to do this. Simply gently shape your bread, keeping the air in before you let it rise for a second time. As Richard Bertinet says in his book Dough “I find people in Britain are taught to knock back the dough to take the air out of it once it has rested. I hate that term – it suggests you need to bash the dough to bits, but you should be much more gentle with it.”

What you should do: Treat your dough with respect, shape gently, never knock all the air out.
Are there any other breadmaking myths you’d like to me to bust? Let me know.
There are plenty more tips to discover in my Bake Better Bread series. Or we hope to see you on bread chat
Salt
In the UK there is no defined amount of salt to add to bread. In France for example it is set at 1.8% of the flour weight. So, 18 gr per kilo. It’s suggested that 1.5% is a good amount. However, you will find recipes that double this or more. Salt is important it adds flavour and regulates the yeast. Read more on this topic


Hi Sammie, Thank you for your comment and so pleased you’re reducing the amount of yeast. I agree, overnight proving is a great thing to use.
You might like to join online Bread Chat on 2nd September.
Great article. I love baking bread and do so frequently. I use my Kitchen Aid stand mixer to mix and knead the dough, then shape by hand. Since Covid and lockdown I’ve been reducing yeast quantities, as it’s been hard to get hold of and the results have been been just as good. Some recipes work better with overnight proving, especially enriched doughs. So glad I’ve found your blog.